How to Generate Test Cases Automatically With AI
Discover how to generate test cases automatically using AI. This practical guide covers effective prompts, CI/CD integration, and real-world QA strategies.
Discover how visual regression testing prevents UI bugs. Our guide covers key tools, techniques, and CI/CD integration to ensure perfect visual consistency.
Automate and scale manual testing with AI ->
At its heart, visual regression testing is a quality assurance safety net designed to automatically catch any unintended visual changes on your website or app. It works by taking screenshots of your user interface and comparing them against a “baseline” or “golden” image to see if anything has shifted, broken, or changed after a code update.

Think of it like an automated game of “spot the difference.” Your functional tests are great at confirming a button works when you click it, but they have no idea if that button is suddenly bright pink, halfway off the screen, or overlapping the main headline. Visual regression testing is what catches those visual bugs, making sure your application not only functions correctly but also looks correct.
This is absolutely crucial for maintaining brand consistency and delivering a polished user experience. We’ve all been there: a tiny CSS tweak meant to fix one component inadvertently wrecks the layout on a totally unrelated page. Trying to manually check every single page after every single change is not just impractical—it’s a recipe for human error.
Automating these visual checks gives your team a reliable defense against embarrassing and costly UI bugs. It protects your brand’s visual identity and helps ensure that every new release maintains a high standard of quality. This isn’t just a niche strategy for perfectionists anymore; the market growth tells the story.
The global market for visual regression testing was valued at USD 0.52 billion and is projected to hit USD 2.33 billion by 2032, growing at an impressive 20.81% each year. This boom shows just how much teams are leaning on automated tools to protect the user experience within their CI/CD pipelines.
At its core, visual regression testing is about preserving the user’s trust. When the UI is inconsistent or broken, users lose confidence in the product, even if the underlying functionality is perfect.
When you start to appreciate the significant impact of effective screenshots and how visual polish shapes user perception, it becomes crystal clear why this type of testing is so important.
It’s easy to get these two confused, but they serve very different purposes. Functional testing is all about behavior and logic, while visual regression testing is purely focused on what the user sees.
Here’s a quick breakdown to highlight the differences:
| Aspect | Visual Regression Testing | Functional Testing |
|---|---|---|
| Primary Goal | Ensures the UI looks correct and consistent across devices and browsers. | Verifies that the application’s features work as expected. |
| Focus Area | Layout, colors, fonts, element positioning, and overall visual presentation. | Business logic, API calls, user workflows, and data processing. |
| How It Works | Compares screenshots (pixels) or DOM snapshots to find visual differences. | Interacts with the UI or APIs to execute specific actions and assert outcomes. |
| Example Bug | A button is misaligned, a font has changed, or an image is overlapping text. | A “submit” button doesn’t save user data, or a login form shows an incorrect error. |
Ultimately, you don’t choose one over the other. A robust testing strategy needs both. They are two different tools that work together to ensure you’re shipping a high-quality product that both works correctly and looks great.
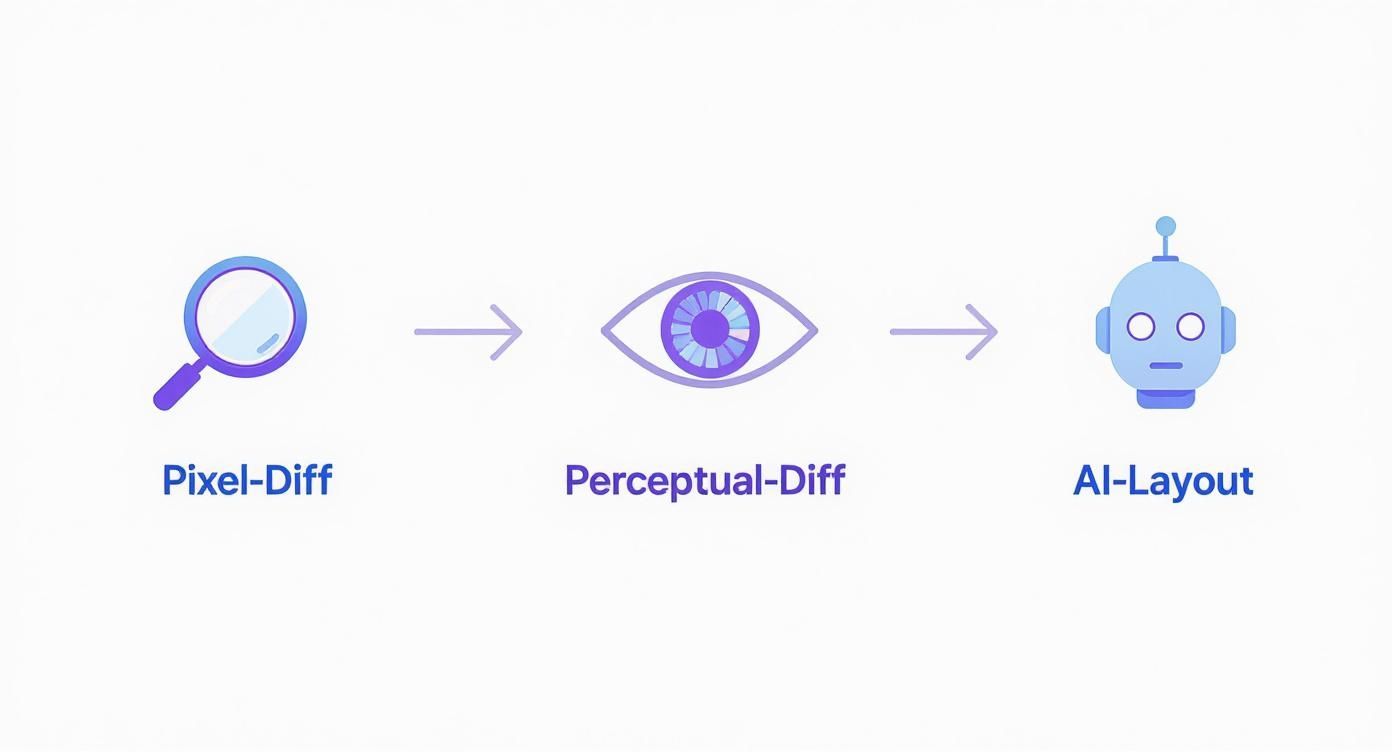
At its heart, visual regression testing asks a simple question: “Does this look the same as it did before?” But how a tool answers that question is where things get interesting. The methods range from brutally literal to surprisingly intelligent, each with its own trade-offs.
Getting a handle on these different approaches is the first step to building a testing strategy that actually works. Let’s break down the three main techniques, starting with the most basic.
The most straightforward method is a pixel-by-pixel comparison, often called a “pixel diff.” Think of it like putting two photos on a light table, one on top of the other. If a single pixel is off—even by the slightest shade—the test fails.
This raw sensitivity is both its greatest strength and its biggest weakness. It’s fantastic for catching the tiniest, most subtle regressions. But that same high-fidelity checking makes it notoriously brittle.
Things like minor font rendering differences between browsers or operating systems can cause a few pixels to shift. A human would never notice, but a pixel diff will scream “failure!” This creates a ton of noise and can quickly lead to your team ignoring the test results altogether.
This is where things get a bit smarter. Perceptual difference algorithms are designed to think more like a human, filtering out the noise that plagues simple pixel diffs.
These engines understand that a one-pixel shift from anti-aliasing isn’t a bug. They’re tuned to ignore tiny, imperceptible changes in color or position that a real user would never see. The core of this approach is using powerful image difference (Image Diff) techniques to compare screenshots, but with an added layer of intelligence to focus on what matters.
A perceptual diff won’t raise a red flag over a minor rendering artifact. It will catch a button that changed from blue to green or a logo that shifted 20 pixels to the left.
This approach drastically cuts down on false positives, making your test suite far more reliable. It’s a great middle-ground, blending precision with real-world practicality so you only get alerts for changes that actually impact the user experience.
The most sophisticated approach uses AI to understand the web page’s underlying structure. Instead of just comparing pictures, DOM and layout-aware analysis looks at the Document Object Model (DOM) and the computed CSS styles of every element.
This method moves beyond just pixels to ask deeper questions about structural integrity:
Because it understands the layout, this technique is much more resilient to things like dynamic content. It can recognize that a headline’s text has changed (which is fine) while still verifying that its font style, weight, and position are exactly right. As AI tools like TestDriver become more common, they can help generate these structural checks automatically, making it easier than ever to build robust visual tests that don’t break every time you update a line of copy.
Let’s get practical. Visual regression testing really shines when you stop doing it manually and make it an automatic part of your daily development cycle. By plugging these checks directly into your Continuous Integration/Continuous Deployment (CI/CD) pipeline, you transform them from a tedious chore into a powerful, automated quality gate.
What this means is that every single time a developer pushes new code, a whole suite of visual tests kicks off automatically. This creates an immediate feedback loop that’s incredibly powerful. Instead of finding a broken layout days later when it hits the staging server, developers can see the visual impact of their code within minutes of making a commit.
Getting this set up involves a few core steps. First things first, you need to generate your initial set of baseline images. Think of these as the “golden” or “perfect” screenshots that your tool will use as the source of truth for every comparison moving forward. This is usually done by running the tests against your main, production-ready branch.
Once you have that baseline locked in, you configure your CI/CD pipeline to do the following:
The whole process is powered by a few different comparison methods, from simple pixel-by-pixel checks to more sophisticated AI-driven analysis.
As you can see, the techniques have evolved quite a bit. We’ve moved from brittle pixel-level analysis, which can be noisy, to intelligent layout-aware checks that dramatically cut down on false alarms.
Of course, not every visual change is a bug. A developer might intentionally redesign a button, tweak a color palette, or change a font. When that happens, the old baseline image is no longer correct. A solid workflow makes it easy for developers to review the visual differences, approve the intentional changes, and update the baseline for all future tests.
This proactive approach is catching on fast. The automated testing segment now makes up the bulk of the market, with over 70% of software teams using some form of automated visual testing. Integrating it has been shown to reduce visual bugs that slip into production by up to 60%, which saves a massive amount of time and effort down the line.
By making visual checks a non-negotiable step in the deployment process, you create a culture where visual quality is treated with the same importance as functional correctness.
Ultimately, the goal is a seamless system. Developers get notified of visual regressions right where they work—in a Slack channel or as a comment on their pull request. For a deeper dive, check out our guide on the best practices for integrating testing into your CI/CD pipeline. This automated safety net is what gives teams the confidence to build and ship features quickly.

A visual regression test suite is only as good as the trust your team has in it. If tests fail for no clear reason—what we call “flakiness”—developers will quickly learn to ignore the results, and the whole system falls apart. Building a stable and reliable suite means being proactive and stamping out that noise from day one.
So, what causes all this trouble? The biggest culprits are almost always dynamic content and inconsistent environments. A user’s profile picture, a “last updated” timestamp, or a rotating ad from a third party will look different nearly every time you run a test. Without a plan to handle these, your tests will cry wolf constantly.
This is where a solid playbook for stability comes into play. With a few key practices, you can build a suite that catches real bugs while smartly ignoring the irrelevant churn.
Your first job is to tell your tests what to ignore. Any part of the UI that you know will change needs to be isolated or masked. Thankfully, most visual testing tools give you ways to do this, so your comparisons only focus on the static, predictable parts of your app.
Here’s how to handle common troublemakers:
These tactics are the foundation of good visual tests—sensitive enough to catch real problems but resilient enough to handle expected changes.
The goal is to make your visual tests deterministic. Given the same code, the visual output should be identical every single time, eliminating environmental factors as a source of failure.
Even after you’ve handled dynamic content, your test environment can still throw you a curveball. A font might render just a little differently on a developer’s Mac than it does on a Linux CI server. Those tiny pixel-level differences are enough to trigger a false positive and send your team on a wild goose chase.
The solution is standardization. Technologies like Docker are perfect for this. By running your tests inside a container, you guarantee they always execute in the exact same environment—same OS, same browser version, same screen resolution—no matter whose machine they’re on.
When you lock down these variables, a test that passes locally will also pass in your CI pipeline.
Ultimately, a reliable test suite isn’t just about writing assertions. It’s about disciplined environment management and smart, intentional test design. Many of these principles overlap with functional testing, which you can read more about in our guide on how to overcome flaky tests and maintenance in functional test automation.
Trying to pick a visual regression testing tool can feel a bit like navigating a maze. You’ve got everything from bare-bones, open-source libraries to slick, all-in-one commercial platforms. The truth is, there’s no single “best” tool—the right choice comes down to what your team needs, what your app looks like, and how much time you can spend tinkering with the setup.
The goal is to find something that slides into your existing workflow without causing a bunch of headaches.
The world of visual testing tools really splits into two camps.
On one side, you have open-source libraries like BackstopJS or the built-in snapshot features in Playwright. These are fantastic if you want total control and don’t mind getting your hands dirty. They’re perfect for engineering-heavy teams that want to build a testing process from the ground up. If you’re exploring this route, checking out some alternatives to BackstopJS for visual regression is a great place to start.
On the other side are the commercial, feature-packed platforms. Think Applitools, Percy, and Chromatic. These are built for scale and simplicity. They often come with AI-powered diffing engines, cloud infrastructure for running tests, and slick dashboards that make reviewing changes a breeze. For teams that need to move fast and collaborate easily, these tools are a lifesaver.
When you’re weighing your options, a few key factors should guide your decision. Getting these right will mean the difference between a tool that gathers dust and one that becomes an indispensable part of your process.
Here’s what I always tell teams to consider:
Choosing a tool isn’t just a technical decision; it’s a workflow decision. The best tool is one that your team will actually use consistently because it makes their lives easier, not harder.
To help you visualize the landscape, here’s a quick breakdown of the popular options.
This table compares some of the leading tools, breaking down where they shine and what their potential trade-offs are. Use it to map your team’s needs to the right category of solution.
| Tool Category | Examples | Best For | Key Strengths | Potential Drawbacks |
|---|---|---|---|---|
| Open-Source Libraries | BackstopJS, Playwright, jest-image-snapshot | Teams with strong engineering skills wanting full control and zero cost. | Completely customizable, free to use, great for building a bespoke testing stack. | Requires significant setup, ongoing maintenance, and in-house expertise to troubleshoot. |
| Developer-Focused Platforms | Percy, Chromatic | Frontend teams working with component libraries (like Storybook) or modern frameworks. | Deep integration with Git workflows, excellent for component-level testing, user-friendly. | Can be less flexible for full end-to-end testing; pricing can scale with usage. |
| AI-Powered Platforms | Applitools | Large enterprises or teams needing high accuracy, cross-browser coverage, and minimal false positives. | Advanced AI diffing (perceptual, layout), smart baseline management, enterprise-grade support. | Higher price point, can be overkill for smaller projects with simple UIs. |
| AI Testing Agents | TestDriver | Teams looking to automate test creation and integrate visual checks into broader E2E test suites. | Generates visual assertion steps automatically, combines functional and visual testing seamlessly. | Primarily focused on test creation and execution, not just snapshot management. |
Ultimately, the best tool is the one that solves your problem. An open-source library might be perfect for a small project, while a large e-commerce site would benefit immensely from an AI-powered platform.
At the end of the day, your decision will likely come down to budget and your team’s capacity. Open-source tools are “free” as in beer, but you’ll pay for them with your team’s time in setup, maintenance, and troubleshooting.
Commercial platforms have a price tag, but what you’re really buying is speed. You get dedicated support, managed infrastructure, and a tool that just works out of the box. This frees up your engineers to focus on building features, not maintaining a test harness. Weigh that trade-off carefully to find the perfect fit for your project and your team.
As teams start to dip their toes into visual regression testing, a few questions pop up almost every time. It’s completely normal to wonder about the nitty-gritty details, especially when you’re dealing with the chaos of modern web applications. Let’s walk through some of the most common hurdles and clear up any confusion.
Think of this as your practical FAQ for turning theory into a real-world, confident testing practice.
This is, without a doubt, the number one thing that trips people up. Dynamic content—think rotating ads, user avatars, or ever-changing timestamps—is a guaranteed way to get a flood of false positives if you don’t handle it right. The trick isn’t to avoid it, but to tell your testing tool to look the other way.
The best approach is to mask or ignore these specific regions during the comparison. Most modern visual testing tools let you specify areas to exclude by using a CSS selector or coordinates. The tool then essentially puts a black box over that section before comparing the new screenshot to the baseline. This ensures that only changes to the static parts of your UI will trigger a failure.
Another great strategy is to use mocked data or a seeded test database. Instead of letting your app pull live, unpredictable data, you can feed it a consistent, predictable set of information for every test run. This way, the user profile picture is always the same, the product list never changes, and timestamps are locked in.
The goal is to make your tests deterministic. A test should only fail when an unintended visual change happens, not because of random data. Masking and data mocking are your two best friends for getting this right.
This is a subtle but really important distinction. People sometimes use the terms interchangeably, but they refer to two very different kinds of “snapshots.”
A code-level snapshot test wouldn’t even blink if a CSS change accidentally made your button invisible. A visual regression test, on the other hand, would catch that immediately. They’re a perfect pair: one validates the code’s structure, and the other validates its final visual output.
Absolutely not. While it definitely cut its teeth in the world of web development, the core idea applies to any graphical user interface (GUI). It’s an incredibly valuable practice for:
The process is always the same: get a baseline image, make a change, take a new picture, and compare the two. The specific tools might differ depending on the platform, but the mission of protecting visual integrity is universal.
This is a totally valid concern. Nobody wants to be the person who brings the CI/CD pipeline to a screeching halt. And yes, if you try to run a thousand visual tests one after another, your build will take forever. But thankfully, this is largely a solved problem.
Modern visual testing platforms are built for this exact challenge. They tackle the speed issue with massive parallelization. Instead of running tests in a long, single-file line, they spin up dozens or even hundreds of environments to run all your tests at the same time. This can slash the total execution time from hours down to just a few minutes.
When you combine this with smart test selection (only running tests relevant to the code that actually changed), the added time to your pipeline is often negligible. The immense value of catching a critical, customer-facing UI bug before it ships far outweighs that small time investment.
Ready to eliminate UI bugs without slowing down your team? With TestDriver, you can generate comprehensive end-to-end tests—including visual checks—from simple prompts. Our AI agent helps you build a robust testing suite that combines functional and visual validation, ensuring your application not only works correctly but looks perfect on every release. Learn more and get started for free at testdriver.ai.
Discover how to generate test cases automatically using AI. This practical guide covers effective prompts, CI/CD integration, and real-world QA strategies.
Discover how automated testing DevOps transforms your CI/CD pipeline. This guide covers practical strategies, tools, and AI's role in accelerating releases.
Master data driven tests with our guide on setup, best practices, and CI/CD integration. Boost your test coverage and build more reliable software.
Discover how automation testing as a service (ATaaS) transforms software quality. Our guide covers benefits, models, and vendor selection for QA and dev teams.
TestDriver uses computer-use AI to test any app - write tests in plain English and run them anywhere.